
Beginner guide · 10 min
How khatam is made, step by step
Editorial team · updated 2026-09-29
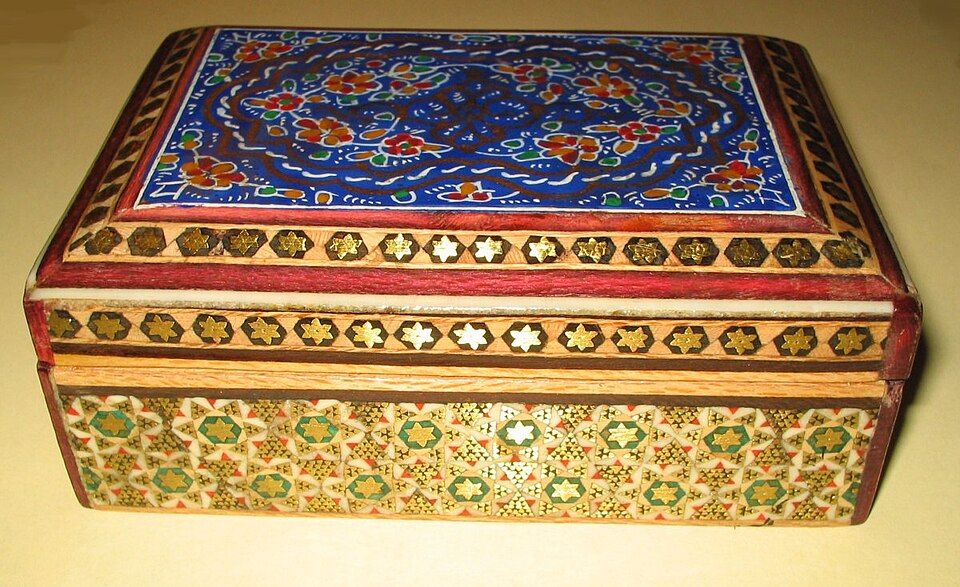
2006-05 · Fabienkhan (Wikimedia Commons) · Public domain (per Wikimedia Commons) · Photo source ↗
- Type
- Beginner guide
- Reading
- 10 min
- Chapters
- 9
- Photos
- 1
From filed rods to glued bundles, sliced sheets and finished boxes: the sequence behind Iranian micro-mosaic inlay.
Filing the rods
Thin rods of wood, bone and metal are filed to triangular sections. Their accuracy decides the quality of every later stage.
Building the bundles
Rods are glued into bundles so that their ends form a small star or hexagon. Bundles are pressed, dried and combined into larger bundles.
Slicing and laying
The bundle is sliced into thin sheets. The sheets are glued to a wooden core and then sanded and varnished.
- Filing
- Bundling and pressing
- Slicing into sheets
- Laying onto a core
- Sanding and finishing
Centres of the craft
Shiraz and Isfahan are the best-known centres; Tehran also has workshops. Attribution of an individual piece to a city needs maker or workshop information.
Time and skill
A small box can take many days. One workshop prepares the rods and bundles, another slices the sheets, and a third applies them to the object. Fine pieces may have more than 400 pieces per square centimetre, though claims vary.
- Construction
- A patterned composite veneer over a support
- Sequence
- Prepare elements, bundle, slice, apply and finish
- Attribution
- Process resemblance does not establish making location
Begin with the components and the support
Khatam is assembled from small elements whose cross-sections form a repeated geometric design. Traditional descriptions discuss wood, metal and bone, but a specific object may use substitutions or a different combination. Record materials as documented or attributed rather than identifying every pale element as bone from its colour. The decorated veneer and the box or frame beneath it are separate parts of the construction.
The core gives the object its shape and supports the veneer. Corners, lids and fittings impose different demands from a flat panel. Before discussing workmanship, distinguish the inlay, supporting structure, coating and hardware. A well-aligned surface pattern does not tell you whether the core joints or hinges will withstand repeated use.
Bundling translates a small cross-section into a repeat
Prepared elements are arranged and joined so that their ends form a motif; larger assemblies combine smaller units. Slicing across that assembly reveals repeated patterned sections. This explains why the design is read across end-grain and metal ends rather than drawn as a single painted surface. Recipes, adhesives, tools and working sequences vary and should follow the documented workshop rather than a universal formula.
Look for how units meet and how the repeat changes at an edge. A geometric interruption may come from fitting the veneer to a shaped support, later repair or a deliberate border. Do not dismantle the object to expose a cross-section or scrape a finish to identify its ingredients. A source photograph of completed inlay illustrates the result, not each unseen manufacturing stage.
Application and finishing are distinct skills
Thin patterned sections are fitted to the support and the joins are finished. Flatness, edge alignment and the handling of corners matter alongside the density of the pattern. A coating can protect and visually unify the surface, but its appearance cannot identify the adhesive beneath it or establish the date of manufacture. Older repairs may also change the original finishing system.
Observe lifted elements, open seams, losses and cloudy or uneven finishes in ordinary and oblique light. Keep observations separate from diagnoses: a lifted edge has several possible causes. Avoid flexing a lid, pressing loose inlay flat or applying polish to make the pattern easier to photograph. Significant instability calls for a conservator’s assessment.
- Record corners and exposed edges
- Distinguish veneer from core and fittings
- Keep loose fragments with the object
- Do not scrape or press unstable elements
Ask which stages the named workshop performs
A workshop may prepare its own bundles, buy patterned sheets, make supports, apply inlay or finish assemblies supplied elsewhere. Ask which of these stages the seller attributes to the named maker. Hand assembly and purchased components are not mutually exclusive, but a precise description is more informative than a blanket claim that everything was made by hand.
Shiraz and Isfahan are important historical centres, yet their names in a listing are not proof of that object’s origin. Request making location, maker documentation and photographs tied to the actual commission or batch. Separate workshop records from the visual observation that an object resembles khatam. This archive’s related photographs are not endorsements of every commercial claim.
| Question or feature | Useful evidence | Limit |
|---|---|---|
| Repeated geometric units | Edge views and documented construction | Not Iranian origin by itself |
| Pale elements | Material record or technical study | Colour does not prove bone |
| Named workshop | Dated making or commission records | City label alone is insufficient |
References and further reading
- [1] H. E. Wulff, The Traditional Crafts of Persia (1966)Historical process descriptions, not a current workshop survey or authentication of an individual object.
These sources provide context, not authentication or provenance for an individual object. Editorial interpretations remain under review.